Installing Kubernetes and kubectl
Overview
Install kubectl, create a local learning cluster (kind recommended), and verify with kubectl get nodes.
kind (Kubernetes in Docker) and Minikube suit laptops. k3s is light for VMs. kubeadm builds production-like clusters. Managed (EKS/AKS/GKE) is Module 19.
This is a core tutorial in Module 2 · Cluster Setup of the REBASH Academy Kubernetes for Cloud & DevOps Engineers series — written for Cloud, DevOps, Platform, and SRE engineers.
Prerequisites
- Kubernetes Architecture
- Docker Engine or Desktop running
Learning Objectives
By the end of this tutorial, you will be able to:
- Install kubectl
- Create a kind (or Minikube) cluster
- Read kubeconfig contexts
- Contrast local vs managed
Architecture
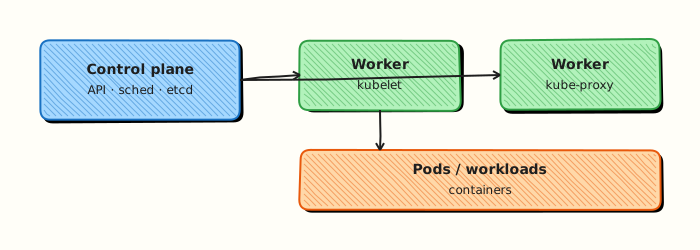
This topic’s control points and relationships are shown below.
Theory
What it is
kubectl is the command-line client for the Kubernetes API. A cluster is a running control plane plus nodes. For learning, you usually create a local cluster with kind (Kubernetes in Docker), Minikube, or k3s. Production often uses managed Kubernetes (EKS, AKS, GKE) or self-managed installs via kubeadm. Your laptop talks to whichever cluster kubeconfig currently points at.
Why it matters
Without a working client and a reachable API, every later module stalls. Choosing the right local tool saves hours: kind nests well in CI and supports multi-node; Minikube focuses on simple single-node developer experience; k3s suits small VMs and edge labs. Understanding kubeconfig prevents the classic mistake of applying manifests to the wrong cluster.
How it works (mental model)
- Install
kubectl(client binary only — it does not include a cluster). - Create or obtain a cluster; receive credentials (certificate, token, or cloud IAM plugin).
- Store clusters, users, and contexts in
~/.kube/config(or paths listed inKUBECONFIG). - A context binds one user to one cluster (and optionally a default namespace).
- Every
kubectlcommand uses the current context unless you override with--contextor--kubeconfig.
Local tools start control-plane and worker components for you. Managed clouds host the API; you still join nodes or use serverless node modes.
Key concepts / comparisons
| Tool | Fit |
|---|---|
| kind | CI + local multi-node in Docker |
| Minikube | Single-node developer experience |
| k3s | Edge / small VMs |
| kubeadm | Self-managed production-like path |
| Managed (EKS/AKS/GKE) | Day-2 control-plane ops reduced |
| Idea | Detail |
|---|---|
| kubeconfig | File(s) describing how to reach APIs |
| Context | Active cluster + user pairing |
| Client vs server version | Minor skew is normal; large gaps break features |
Common pitfalls
- Installing only Docker Desktop “Kubernetes” and not verifying
kubectl get nodesReady. - Leaving production credentials as the default context — always check
kubectl config current-contextbefore destructive commands. - Mixing kind and Minikube clusters without renaming contexts; names collide in mental models.
- Expecting Ingress or LoadBalancer to work on kind without installing a controller or using port mappings.
- Treating a local single-node lab as equivalent to HA production networking and storage.
Hands-on Lab
Objective
Create a reusable verify-cluster.sh script that checks kubeconfig context, node Ready state, and declarative apply sanity with --dry-run=client.
Prerequisites
- A working Kubernetes cluster (kind, minikube, or any lab cluster)
- kubectl installed and on your
PATH - Writable workspace at
~/rebash-k8s/module-02
Lab environment
Workspace: ~/rebash-k8s/module-02
Use a disposable local cluster. Never target a shared production API server.
Real-world scenario
Your team ships a onboarding script every new engineer runs on day one. It must fail fast when kubeconfig points at the wrong cluster, when nodes are not Ready, or when the API rejects a harmless dry-run apply. You build and test that script now.
Step-by-step tasks
Task 1 – Create verify-cluster.sh
Create verify-cluster.sh:
#!/usr/bin/env bash
set -euo pipefail

echo "== context =="
kubectl config current-context | tee context.txt

echo "== cluster reachability =="
kubectl cluster-info | tee cluster-info.txt

echo "== nodes Ready =="
kubectl get nodes -o wide | tee nodes-wide.txt
grep -q ' Ready ' nodes-wide.txt

echo "== dry-run apply sanity =="
kubectl apply --dry-run=client -f sanity-pod.yaml | tee dry-run-out.txt
grep -q 'dry run' dry-run-out.txt || grep -q 'configured' dry-run-out.txt || grep -q 'created' dry-run-out.txt

echo "verify-cluster.sh: all checks passed"
Create sanity-pod.yaml (used only for dry-run in this task):
apiVersion: v1
kind: Pod
metadata:
  name: sanity-dry-run
  namespace: default
spec:
  containers:
    - name: pause
      image: registry.k8s.io/pause:3.9
  restartPolicy: Never
Make executable and run:
cd ~/rebash-k8s/module-02
chmod +x verify-cluster.sh
./verify-cluster.sh | tee verify-run.txt
grep -q 'all checks passed' verify-run.txt
Expected output
verify-run.txt ends with verify-cluster.sh: all checks passed; nodes-wide.txt shows Ready nodes.
Task 2 – Prove kubeconfig context and namespace isolation
Create namespace.yaml:
Apply namespace and confirm context still works:
cd ~/rebash-k8s/module-02
kubectl apply -f namespace.yaml
kubectl config view --minify -o jsonpath='{.contexts[0].context.cluster}{"\n"}{.contexts[0].context.user}{"\n"}' | tee context-details.txt
kubectl get ns rebash-m02 | tee ns-check.txt
grep rebash-m02 ns-check.txt
Expected output
Namespace rebash-m02 appears Active in ns-check.txt.
Task 3 – Server-side dry-run (optional, if supported)
Create probe-pod.yaml:
apiVersion: v1
kind: Pod
metadata:
  name: probe-install
  namespace: rebash-m02
spec:
  containers:
    - name: busybox
      image: busybox:1.36
      command: ["sh", "-c", "sleep 3600"]
      resources:
        requests:
          cpu: 10m
          memory: 16Mi
  restartPolicy: Never
Validate with server dry-run when your cluster supports it:
cd ~/rebash-k8s/module-02
kubectl apply --dry-run=server -f probe-pod.yaml | tee server-dry-run.txt
grep -E 'created|configured|unchanged|dry run' server-dry-run.txt
Expected output
Server accepts the manifest (wording varies by kubectl version).
Validation steps
-
./verify-cluster.shexits 0 and printsall checks passed - Current context and cluster info captured in evidence files
- Namespace
rebash-m02exists - Dry-run apply of
sanity-pod.yamlsucceeds
Common errors and fixes
| Error | Cause | Fix |
|---|---|---|
Unable to connect to the server | Cluster stopped or wrong context | kubectl config get-contexts; start kind/minikube |
| grep Ready fails | Nodes still booting | Wait; kubectl get nodes -w |
--dry-run=server forbidden | RBAC or old API | Skip Task 3; client dry-run is enough for onboarding |
| Wrong cluster in context | Multiple kubeconfigs | kubectl config use-context <lab-context> |
Challenge exercise
Extend verify-cluster.sh to accept an expected context name as $1 and exit non-zero when kubectl config current-context does not match.
Learning outcomes
- Built a repeatable cluster verification script
- Confirmed kubeconfig context and node Ready state
- Validated manifests with client (and optional server) dry-run
Cleanup
Validation
- Lab commands run under
~/rebash-k8s/module-02/ - You can explain each Theory section in your own words
- You used modern tooling where it applies to this topic
- You can describe one production failure mode for this topic
Code Walkthrough
Production practice for Installing Kubernetes and kubectl always combines:
- Inspect before you change (status, plan, logs, dry-run)
- Prefer reversible, documented changes (Git, IaC, drop-ins, version pins)
- Capture evidence (command output, pipeline logs) for handovers
- Prefer current tools and APIs over legacy shortcuts
- Least privilege — escalate credentials only when required
Keep runbooks short enough to follow under pressure. Automate checks; keep humans for judgement.
Security Considerations
- Treat credentials and tokens for kubernetes as privileged — never commit them
- Prefer short-lived auth (OIDC, roles, SSO) over long-lived keys
- Validate blast radius before apply/deploy/delete operations
- Restrict who can approve production changes
- Collect audit logs; limit who can read sensitive traces
Common Mistakes
Installing only Docker Desktop “Kubernetes” and not verifying kubectl get nodes Ready.
Validate assumptions against the Theory section and official docs before changing production.
Leaving production credentials as the default context — always check `kubectl config curre
Lab shortcuts (open security groups, admin roles, skip approvals) must not ship unchanged.
Changing production without a rollback path
Always know how to revert (previous artefact, prior release, state rollback, DNS failback).
Best Practices
- Encode Installing Kubernetes and kubectl changes as code and review them in pull requests
- Pin versions (images, modules, actions, provider plugins)
- Separate environments with clear promotion gates
- Alert on symptoms with runbooks attached
- Destroy lab resources; tag everything with owner and expiry where possible
Troubleshooting
| Symptom | Likely cause | Fix |
|---|---|---|
| Auth / permission denied | Wrong identity, policy, or scope | Check caller identity, roles, and least-privilege policies |
| Timeout / no route | Network, DNS, security group, or endpoint | Trace path, DNS, and allow-lists before retrying |
| Drift / unexpected plan | Manual change or wrong state/workspace | Reconcile desired vs actual; avoid click-ops on managed resources |
| Pipeline/job red | Flaky step, cache, or missing secret | Read failing step logs; bisect recent workflow/config changes |
| Cost spike | Idle load balancer, NAT, oversized compute | Inventory billable resources; stop/delete labs promptly |
Summary
Installing Kubernetes and kubectl is essential for Cloud and DevOps engineers working with kubernetes. Practise the lab until the inspection and change path is muscle memory, then continue the track.
Interview Questions
- What components must be reachable for kubectl to manage a cluster?
- What does kubeconfig contain, and why should it be protected?
- How do you verify that your client can authenticate to the API server?
- What are the risks of using an admin kubeconfig on a shared workstation?
- Name two common local cluster options for learning Kubernetes.
Sample answer — question 2
Run kubectl cluster-info or kubectl get nodes. Success shows credentials and network path to the API server work. Failures usually indicate wrong context, expired tokens, or network blocks.
Sample answer — question 4
Admin kubeconfigs grant cluster-wide power. On shared machines they risk credential theft and accidental destructive commands. Prefer short-lived credentials, least privilege, and separate contexts per environment.